My son is studying fossils this week in science. We found a super-easy way to add a little bit of excitement to our lessons. We hope you enjoy it as much as we did. 
We decided to try our hand at making fossil cookies.
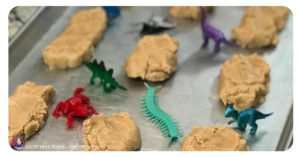
You may be lucky enough to have some plastic creatures already at your home, but we didn’t. We went to the dollar store and found some cheap plastic bugs and dinosaurs. The flatter they are the better for this activity. I put my son in charge of washing up the plastic creatures. After giving the plastic toys a sudsy spa treatment (he loves any reason to play in water), we got them dried up and ready to press into our fossil-cookie dough.
My kids love peanut butter, so we used a tried and true Jif® recipe, Irresistible Peanut Butter Cookies. We’ve been baking up this recipe for years and it is a winner every time.
Here is the recipe.
Recipe:
Preheat oven to 375℉.
In a large bowl, combine 3/4 cup Jif® peanut butter, 1/2 cup all-vegetable shortening, 1 1/4 cup firmly packed light brown sugar, 1 tablespoon milk, and 1 tablespoon vanilla extract. Beat with electric mixer on medium speed until well blended. Add 1 large egg and beat until just blended.
In a separate bowl, combine 1 2/3 cup all-purpose flour, 3/4 teaspoon baking soda, and 3/4 teaspoon salt.
Add the dry ingredients slowly to the wet ingredients on low speed, mixing just until blended.
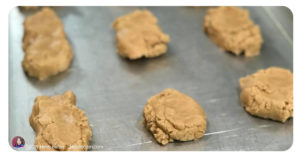
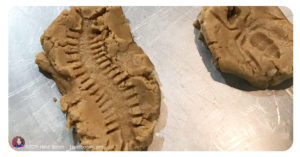
We used approximately 2 tablespoons of dough at a time on a baking sheet. (Sometimes we added more dough, sometimes less). We didn’t make the dough pretty or into balls, we made very irregular shapes with the dough, you know, like flat rocks. I tried to form the rock dough, to about the same shape as the item that would be imprinted into it. (For example, the fly was more of a circle shape, while the dough for the centipede was long and narrow.)
Place cookie dough about 2 inches apart on the baking.
We put about 1/2 cup of white granulated sugar in a bowl.
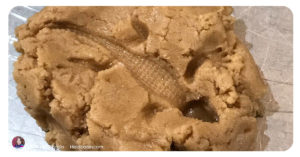
To keep the plastic creatures from sticking in the dough, we dipped them into the sugar, then pressed them into the cookies.
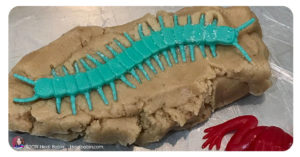
Be sure to press every part of the creature into the dough. The cookie dough will rise slightly when baking, so a good imprint is important. When you are satisfied with the imprint, slowly pull the plastic toy out. (DO NOT BAKE the plastic creature in the dough.) Dip the creature into the sugar every time before pressing into the cookie dough.
Bake for 6-7 minutes (or until the edges are just beginning to turn brown).
Allow the cookies to cool for 2 minutes on the baking sheet, then you may put them on a wire rack to cool completely.
SO cute!! I love any learning connection project that involves cookies 🙂
Author
Thank you Sarah! I am not sure if my kids had more fun squishing their fingers through the dough or eating the “fossils”. Either way we had a lot of fun.